7:28Watch her paint metalEpisode 07 · I Used Everything I’ve Learned on ONE MiniatureEpisode 07: base, wash, highlight and drybrush on all that metal.Watch on YouTube →
01Which metal method should a beginner use?
General practice: there are two broad routes. Metallic paints contain real metal flakes, so the shine is built into the paint. Non-metallic metal (NMM) fakes the shine with ordinary colours and careful highlights, and it is much harder. Most beginners start with metallic paints.
She made exactly that call in Episode 03, after watching Richard Gray paint his pipes with NMM:
“Richard used NMM on his and I did not simply because I can't. I'm already learning the highlights, the shadows, the edge highlighting, the blending, and how to thin my paint properly. I think we can leave NM for another day.” — Episode 03
It is a fair order to learn things in. The pieces she lists are covered on highlighting and thinning paint.
02How do you paint metallics, step by step?
General practice, not a claim about her exact paints:
- Prime and paint the surrounding colours first if you can, so you are not fighting for tight spaces later. See paint order.
- Shake the metallic paint well. The metal flakes sink, and an unmixed bottle gives a dull, patchy coat.
- Thin coats, not one thick coat. Two thin coats cover smoothly and keep the flake even.
- Wash it into the recesses so the metal gets depth. How to use a wash.
- Bring the shine back with a lighter metallic on the raised edges, or a light dry brush.
- Keep the brush for metal separate from your best detail brush, because metallic flakes wear brushes quickly.
03How did she paint the metal on camera, step by step?
Episode 07, her biggest model, is mostly metal. Her own words:
“With the armor finally done, it was time to move on to the metallics, and there is a lot of it. Secretly, I wish that I had airbrushed this part. For the larger areas, I'm sticking with something that I've gotten very comfortable with. Base coat, wash, and bring the highlights back.” — Episode 07
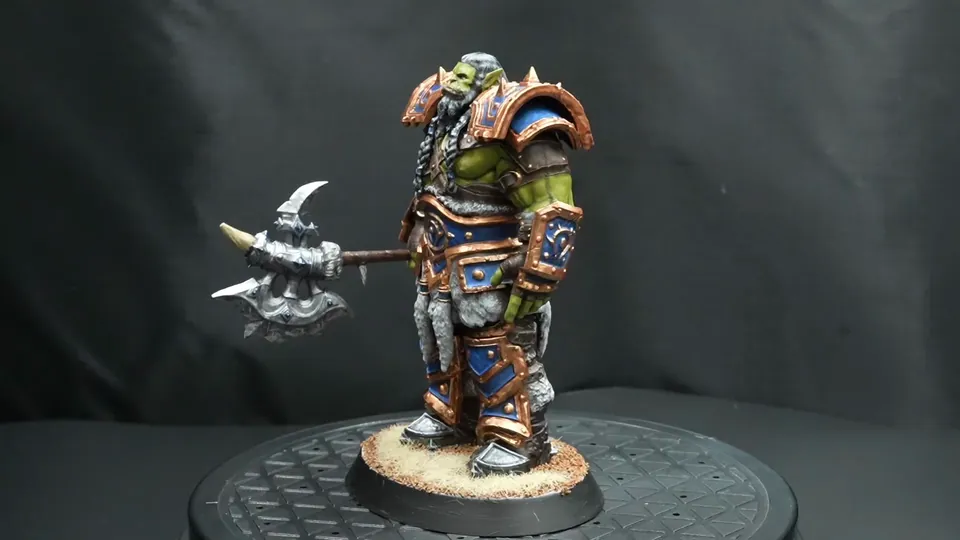
Then, in her words, “a quick dry brush to bring that metal back.” That is the same loop as Episode 05, where she gave bright bronze “a good wash to dirty everything down, then dry brush some of that brightness back into it.”
For the pipes she tried something different:
“When I painted Thrawl, I tried a metallic technique from Winsor & Newton acrylic. So, I thought it's fun to use that again. […] Same model, two different ways of painting the metal. I think they're working pretty good together.” — Episode 07
(“Thrawl” in the auto-captions is Thrall, her Episode 06 model.)
Her metal, step by step (10 photos)
Every photo below is a still straight from Episode 07, in the order she painted it: just her tank and her brushes.
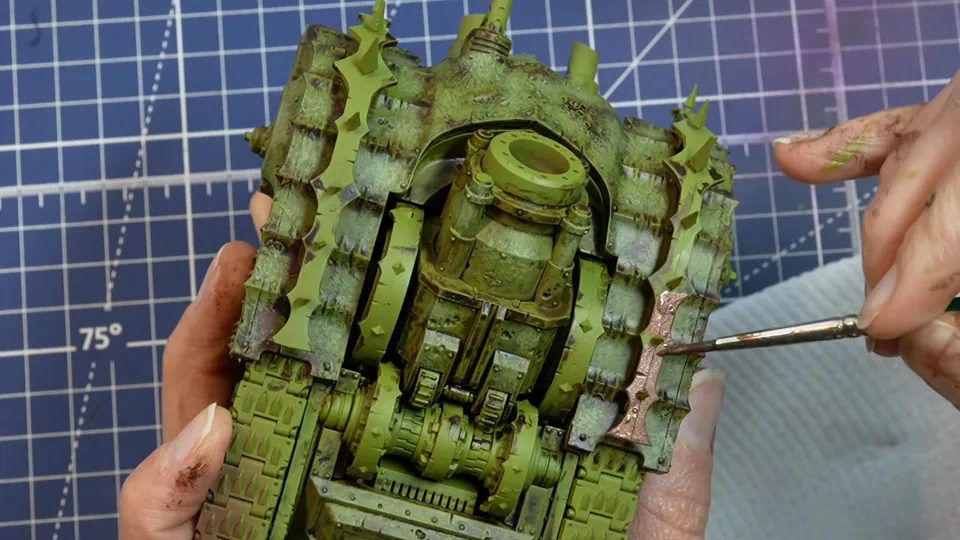
01 · Base coat the metal Copper trim going on over the finished green armour with a fine brush. Metal comes after the armour, not before. Watch at 2:52 → 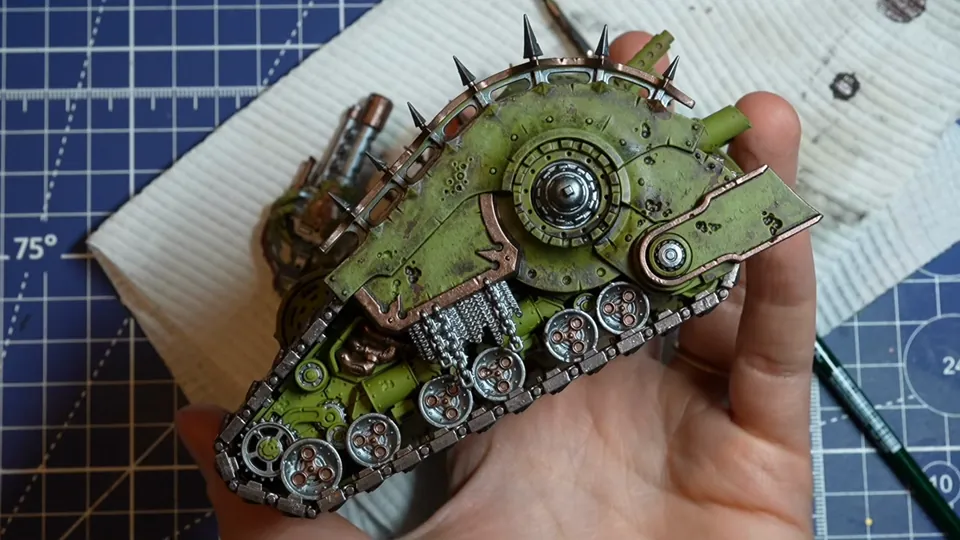
02 · Silver and copper blocked in Tracks, chains and wheels in silver, trims in copper, all still clean and bright. Her words: “Base coat, wash, and bring the highlights back.” Watch at 3:04 → 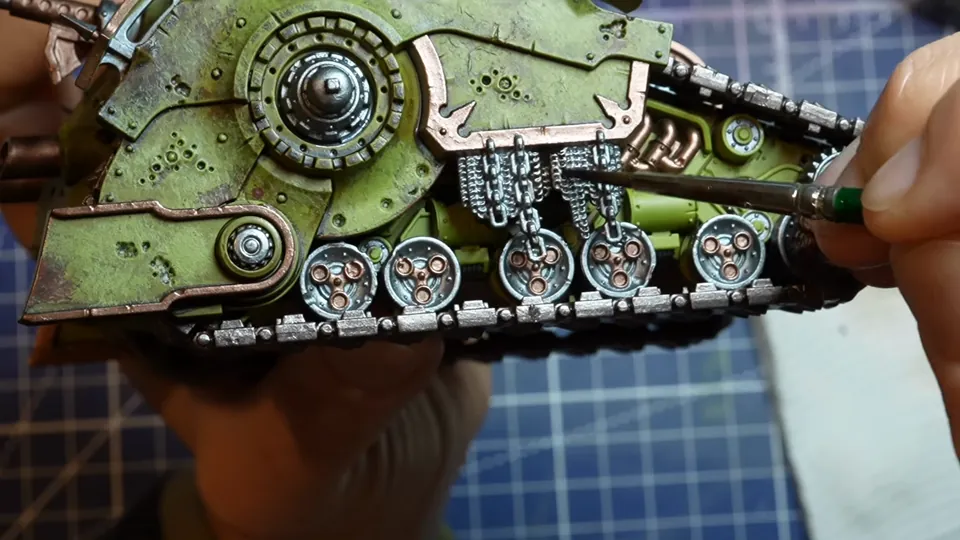
03 · Wash it down A wash brushed into the chains and wheel hubs so the recesses go dark. “And yes, another wash. Apparently, we’re friends now.” Watch at 3:25 → 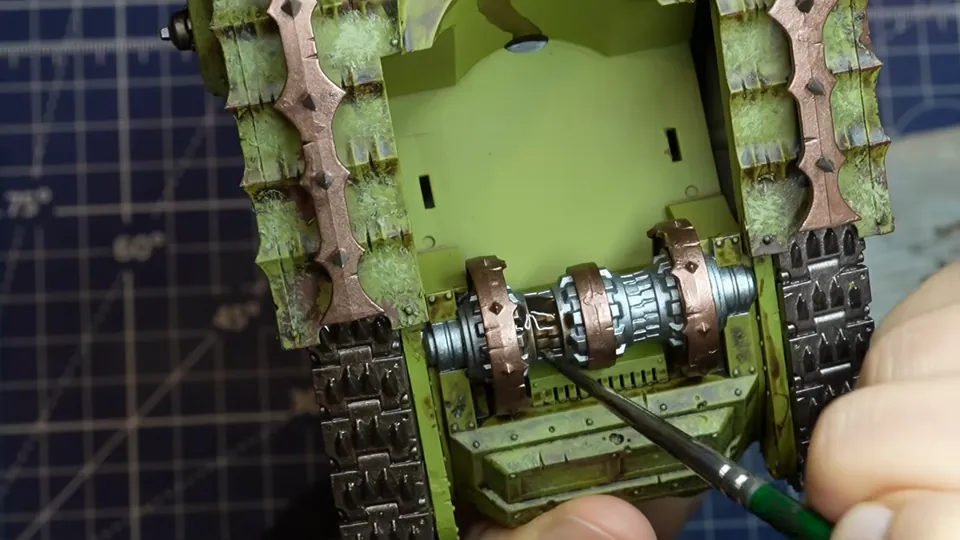
04 · Bring the highlights back Fine-brush work on the rear axle, putting brightness back on the raised metal after the wash. Watch at 3:49 → 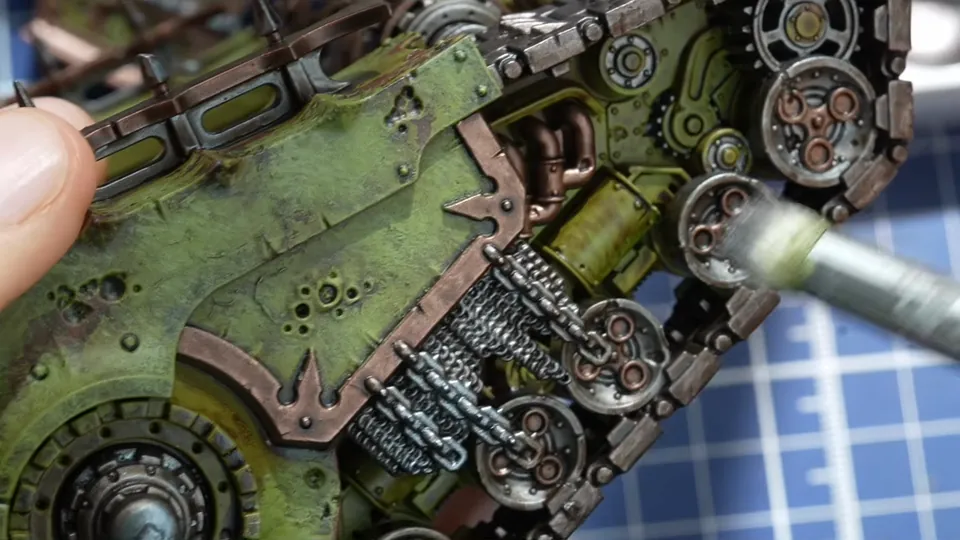
05 · A quick dry brush A soft dry brush over the wheels and chains: “a quick dry brush to bring that metal back.” Watch at 3:58 → 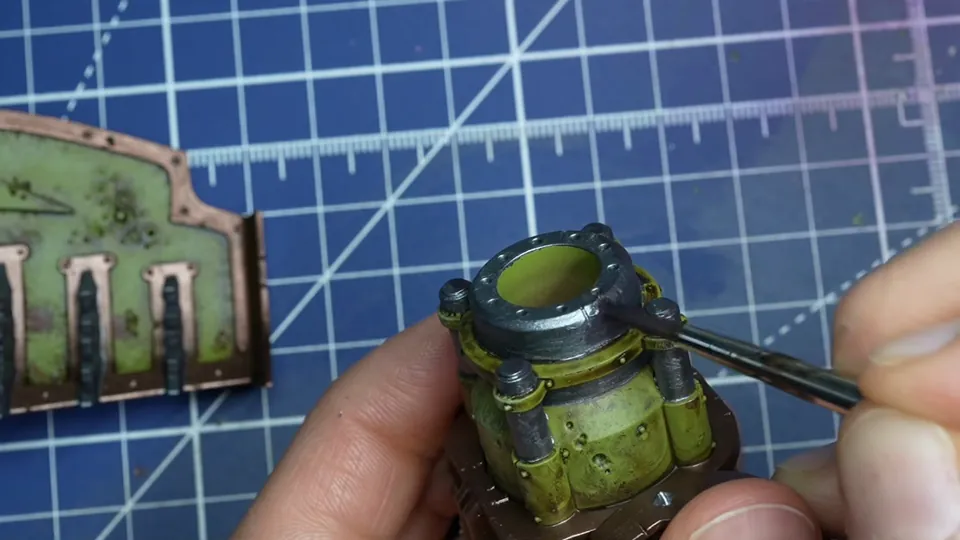
06 · A second method for the pipes For the pipes she reused the Winsor & Newton acrylic metallic technique she first tried on Thrall in Episode 06. Watch at 4:19 → 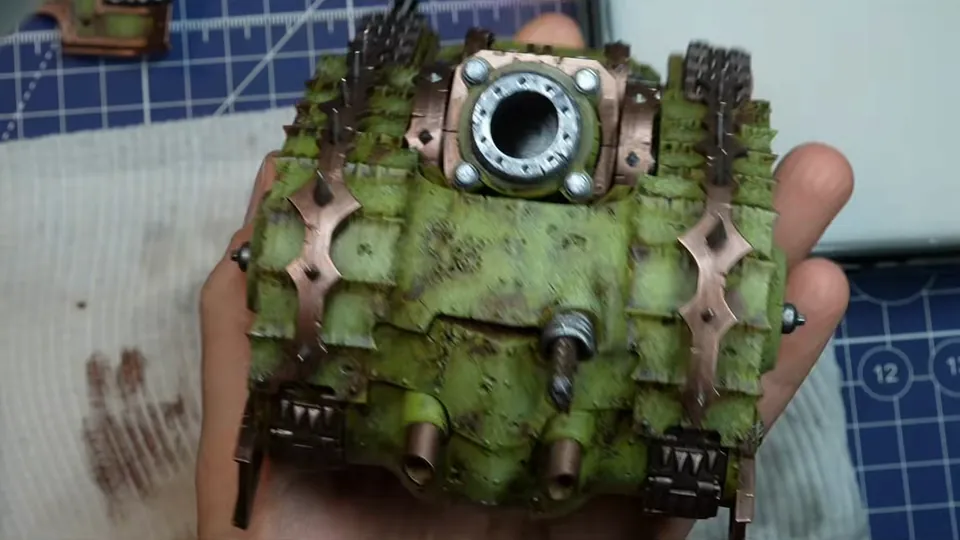
07 · Two metals on one model “Same model, two different ways of painting the metal. I think they’re working pretty good together.” Watch at 4:34 → 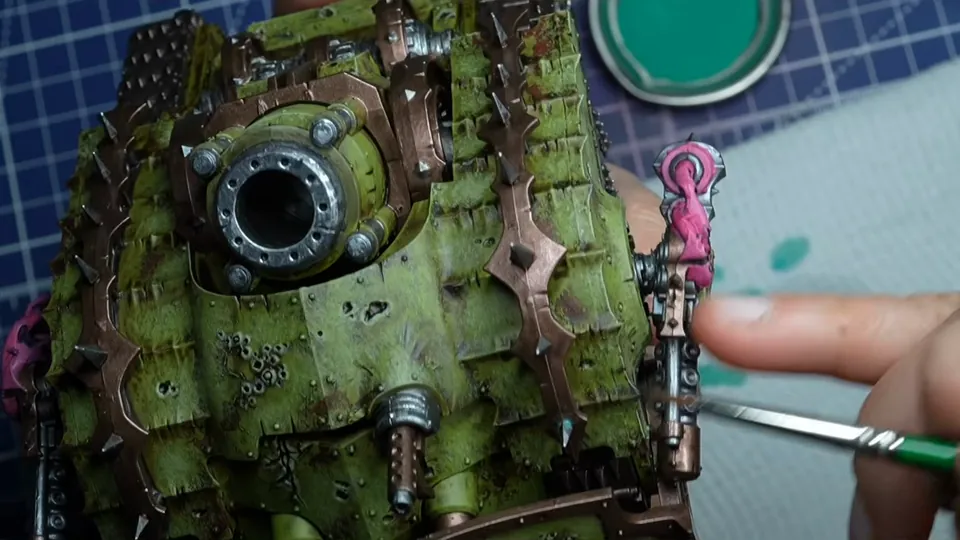
08 · Corrosion last Once it looked “way too clean”: turquoise dabbed onto the copper. “Some rust, some corrosion.” Watch at 6:26 → 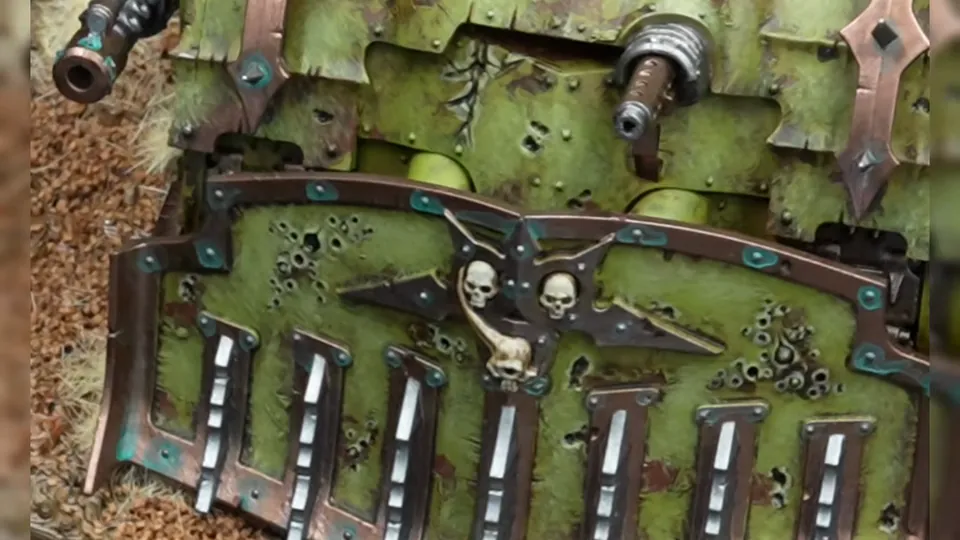
09 · The finished metal Turquoise corrosion in the corners of the copper and bright silver on the blade teeth, on her finished base. Watch at 6:50 → 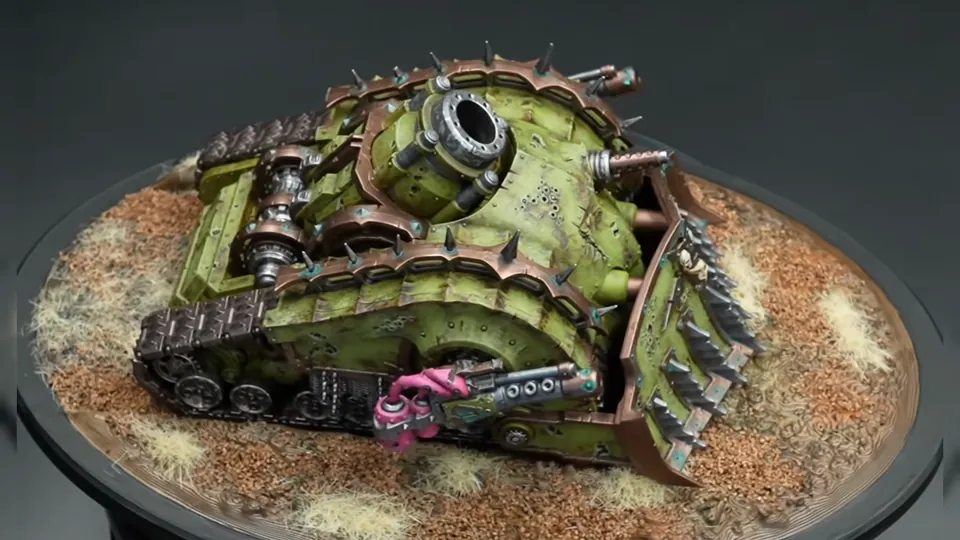
10 · Done Her biggest model so far, finished: “I’m still a beginner […] But I made this.” Watch at 7:03 →
Her loop, in one line: base coat, wash, highlight, dry brush, then corrosion once it looks too clean. The general version of each step is in section 02; the rust and corrosion finish is in section 04.
04How do you add rust and corrosion?
She did this twice. In Episode 03 she asked the hobby store how to make a Death Guard weapon look rusty and was handed a bottle of rust effect:
“By my standard, it worked great. […] and then adding the blue green effect was really something that brought everything together. Suddenly his weapons actually look and felt old and dirty and corroded.” — Episode 03
In Episode 07 she did it as a last step: “For Death Guard, this looks way too clean. And for finishing touches, I decided to stop worrying about keeping it clean. Some rust, some corrosion.”
General practice agrees: rust and verdigris go on last, in small amounts, on edges and low spots where water would sit. A ready-made rust effect paint is the simplest way in.
05What goes wrong with metallics?
General rules of thumb:
- Patchy, grainy coat: the paint was not shaken enough or was applied too thick. Thin coats fix it.
- Dull after the wash: expected. Add highlights or a light dry brush back on top, which is what she did.
- Too clean for the model: add rust, grime or corrosion, as she did on a Death Guard model.
- Too many edges to highlight: she counts about 500 on the Episode 07 model. Do the main edges and accept the rest.
See also common beginner painting mistakes.
Back to the full beginner's guide: what to buy, priming, washes and every mistake so far →
FAQ
- How do you paint metal on a miniature?
- Paint the metal area with a metallic paint in thin coats, shade it with a wash so the recesses darken, then bring the shine back with a highlight or a quick dry brush. This is general painting practice. It is also the routine The Pigmentum used on the large metal areas in Episode 07: base coat, wash, bring the highlights back.
- What is the easiest way to paint metallics as a beginner?
- Base coat, wash, highlight. In Episode 03 she chose metallic paints with a shade over non-metallic metal (NMM), saying she was already learning highlights, shadows, edge highlighting, blending and paint thinning and would leave NMM for another day.
- Why does metallic paint look dull after a wash?
- A wash tints the metal and dulls the shine. In Episode 05 she gave bronze a good wash to dirty it down, then dry brushed some of the brightness back into it. In Episode 07 she did the same with a quick dry brush to bring the metal back.
- How do you make a weapon look rusty?
- Over the metal, add a rust effect and then a blue-green corrosion layer. In Episode 03 she bought a bottle of rust effect from the hobby store for a Death Guard weapon, and the added blue-green made it look old, dirty and corroded. In Episode 07 she finished her biggest model with some rust and some corrosion because Death Guard look way too clean otherwise.
- Do you have to paint metal the same way everywhere on a model?
- No. In Episode 07 she painted the larger metal areas with base coat, wash and highlights, but tried a metallic technique from Winsor & Newton acrylic for the pipes, which she had also used on Thrall. Her verdict: same model, two different ways of painting the metal, and they work well together.