 5:58Watch her copy a proEpisode 03 · Can a Beginner Copy a Golden Demon Winner?Episode 03: the wet brush technique she copied from Richard Gray, tried on the Death Shroud.Watch on YouTube →
01What is the difference between blending, glazing and a wash?
General practice. Wet blending joins two colours on the model while both are still wet, so the join fades. Glazing lays very thin, transparent layers over dry paint, so each layer nudges the colour underneath. A wash is thin paint meant to run into the recesses and add depth; see how to use a wash. All three rely on thin paint: how to thin paint.
Honest note: she has not made a dedicated blending or glazing tutorial. The three moments below are everything she has said about it on camera, so the methods themselves are labelled general practice.
02How do you blend and glaze, step by step?
General practice, not a claim about her exact brushes or paints:
Wet blending
- Pick a small area (one panel, one fold). Paint dries fast, so work in small zones.
- Choose two or three close colours: a shadow, a mid-tone and a light. Mix them before you start, as she was told to in Episode 03.
- Thin each colour to a milk-like consistency so the edges can move.
- Lay the shadow, then the light, so they touch while still wet.
- Brush the join lightly with a clean damp brush, back and forth, until the two fade into each other. Stop before it turns muddy.
Glazing
- Let the base layer dry fully.
- Mix paint with plenty of water (or glaze medium) until it is nearly see-through.
- Brush it over the area you want to shift, wiping extra off the brush first so it does not pool.
- Wait until dry, then repeat. Three or four thin layers look smoother than one thick one.
03What did she do on camera?
Three moments, none of them a lesson, all honest. In Episode 03, copying a Golden Demon-winning miniature by Richard Gray:
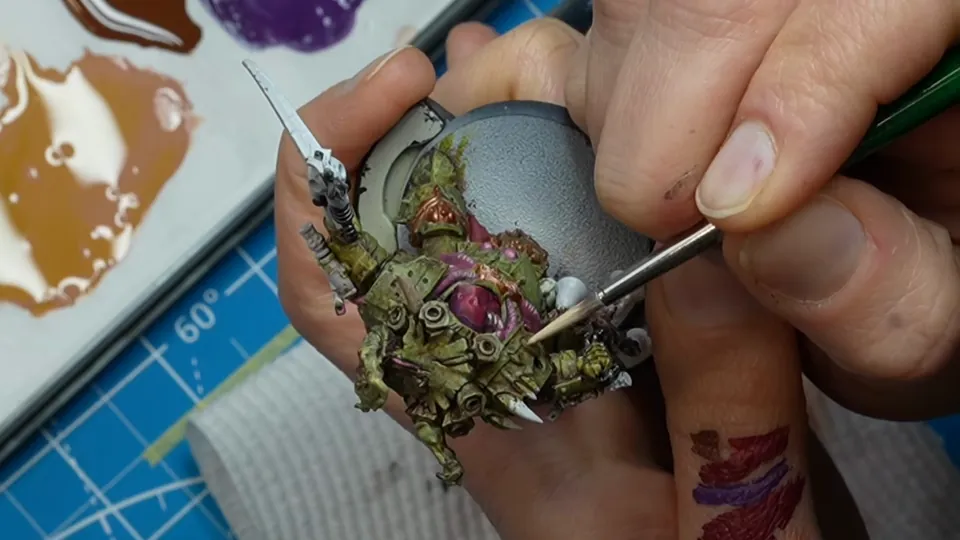
“He used a wet brush technique to blend the colours and I could actually see the colours slowly fading into each other, which was really satisfying. His armor looked like an armor instead of a patchwork of pieces together.” — Episode 03
In the same episode she describes his first step: “start by mixing four colours from the beginning and establish the light and shadows instead of just painting the whole thing in one colour and then worrying about the shadows later.” Then a more candid moment in Episode 05, after edge highlighting some black trousers:
“Maybe I should have wet blended them, glazed them. I don’t know. I really wish I had never edge highlighted those pants, but again, I sucked it up, moved on.” — Episode 05
And in Episode 07, on her biggest model, after a wash dulled the armour:
“A few weeks ago when I tried copying Richard Gray, I learned this technique between wet blending and dry brushing. It worked very well on the Death Shroud. So, now I’m going to try it on something significantly bigger.” — Episode 07
So her pattern so far: she learned wet blending by copying a pro, reached for it again on a big model, and still wonders whether glazing would have fixed her trousers. See how to drybrush for the other half of that Episode 07 technique.
04Blend, glaze, or edge highlight?
General practice: wet blend for large, smooth surfaces such as armour panels, cloaks and skin, where a hard line would look wrong. Glaze to shift or tidy a colour you have already painted, or to soften a transition that came out too sharp. Edge highlight for crisp lines on hard edges. She found edge highlighting on black trousers went wrong in Episode 05, which is exactly where the general advice says a soft transition would suit. See how to highlight miniatures.
05What goes wrong?
General rules of thumb:
- Patchy, streaky blends: paint too thick, or it dried before you blended. Thin it and work a smaller area. She mentions the early colours looking “very patchy” in Episode 03 before the shapes came together.
- Muddy colour: too much brushing, or colours too far apart. Use closer colours and stop sooner.
- Glaze looks chalky or pools in recesses: too much paint or not enough water. Wipe the brush and go thinner.
- Visible hard edge: repeat with a thinner glaze over the edge.
See also common beginner painting mistakes.
Back to the beginner's guide: how do I blend colours smoothly? →
FAQ
- What is glazing in miniature painting?
- Glazing means brushing on a very thin, watery layer of paint so the colour underneath shows through and shifts slightly. You build smooth tone changes with several thin layers. This is general painting practice; she has not made a glazing tutorial.
- What is wet blending?
- Wet blending means putting two or more colours next to each other while they are still wet and brushing the join so they fade into each other. In Episode 03 she describes Richard Gray's wet brush technique making the colours slowly fade into each other, and in Episode 07 she says she learned a technique between wet blending and dry brushing from copying him.
- What is the difference between glazing and wet blending?
- General practice: wet blending joins two colours on the model while both are wet, so you have to work fast. Glazing lays thin transparent layers over dry paint, so you can go slowly and stop whenever it looks right. Neither is a wash: a wash is thin paint that runs into the recesses.
- How do you blend colours on a miniature as a beginner?
- General practice: thin your paint, work on a small area, and use two or three close colours rather than a big jump. Her own advice from the camera is to mix your light and shadow colours at the start and move from dark to light, as Richard Gray said in Episode 03.
- Did she glaze or wet blend her miniatures?
- Only partly, and she is open about it. In Episode 05 she says she maybe should have wet blended or glazed her pants instead of edge highlighting, and adds she doesn't know. In Episode 07 she used a technique between wet blending and dry brushing on the armour.
